

Air conditioning systems are essential for maintaining a comfortable indoor environment, especially during hot summer months. But like any home appliance, air conditioners can experience problems that may affect their performance and efficiency. The good news is that many common AC issues can be identified and addressed with some basic troubleshooting before calling a professional.
In this article, we will cover easy ways to check your air conditioner for problems. By performing these simple checks, you can save time, money, and avoid uncomfortable situations. Whether your AC isn’t cooling properly, making unusual noises, or struggling to maintain the desired temperature, these steps will help you diagnose potential issues and keep your cooling system running efficiently.
1. Check the Thermostat Settings
One of the most common reasons an air conditioner may not work as expected is improper thermostat settings. If your AC isn’t cooling as it should, start by checking the thermostat.
- Is it set to the right mode? Ensure your thermostat is set to “Cool” rather than “Fan” or “Off.” Sometimes, the mode can accidentally be changed, and the system might be circulating air without cooling it.
- Temperature setting: Verify that the temperature is set lower than the current room temperature. If the thermostat is set too high, the AC won’t kick in.
- Dead batteries: Some thermostats are powered by batteries, and if the batteries die, the thermostat may not function properly. Replace the batteries if necessary.
- Programmable thermostat settings: If you have a programmable thermostat, check the programmed schedule to ensure it is set correctly. Sometimes, the system could be following an old or incorrect schedule that doesn’t match your current needs.
2. Inspect the Air Filters
Clogged or dirty air filters are one of the most common causes of air conditioning problems. Over time, filters accumulate dust, dirt, and debris, which can block airflow and reduce the system’s efficiency.
- Locate the air filter: The air filter is typically located in the return air duct or near the air handler unit. Some AC units may have more than one filter.
- Check the filter’s condition: Remove the filter and inspect it for dirt or debris. If the filter looks dirty or clogged, it’s time to clean or replace it. Most manufacturers recommend replacing air filters every 1-3 months, but this depends on usage and the quality of your indoor air.
- Effects of a clogged filter: A dirty filter restricts airflow, causing the AC to work harder to cool your home, which can lead to higher energy bills and decreased cooling capacity.
3. Inspect the Circuit Breaker
If your air conditioner is not turning on at all, there’s a chance the issue could be with the power supply.
- Check the circuit breaker: Locate your home’s electrical panel and check whether the circuit breaker controlling the AC unit has tripped. If it has, reset the breaker by flipping it back to the “On” position. If the breaker trips again after resetting, there may be a deeper electrical issue, and you’ll need to contact a professional.
- Check the disconnect switch: Many air conditioning units have a disconnect switch located near the outdoor unit. Ensure that this switch is in the “On” position, as turning it off will prevent the unit from running.
4. Inspect the Outdoor Unit
The outdoor unit, or condenser, is a crucial part of your AC system. It helps dissipate heat outside your home, allowing the system to cool the indoor air efficiently. If the outdoor unit is obstructed or damaged, it can lead to performance issues.
- Clear debris around the unit: Check the area around the outdoor unit for any obstructions such as leaves, grass, dirt, or other debris. Make sure there’s at least two feet of clearance around the unit to ensure proper airflow. Blockages can cause the unit to overheat and struggle to cool your home.
- Clean the condenser coils: The condenser coils can accumulate dirt and debris over time, which can reduce the unit’s efficiency. Turn off the power to the AC unit, then use a hose to gently rinse the coils. Avoid using high-pressure water, as this can damage the fins or other components.
- Check for visible damage: Inspect the outdoor unit for any visible damage, such as bent fins, broken components, or oil leaks. If you notice significant damage, contact an HVAC professional for repairs.
5. Check for Refrigerant Leaks
Refrigerant is the chemical that allows your air conditioner to cool the air. Low refrigerant levels can prevent the system from cooling effectively. Unlike other fluids in home appliances, refrigerant does not get used up or depleted under normal circumstances, so a low refrigerant level typically indicates a leak.

- Signs of a refrigerant leak: Common signs of a refrigerant leak include:
- The AC is blowing warm or lukewarm air.
- You hear a hissing or bubbling sound near the refrigerant lines.
- Ice forms on the evaporator coils or refrigerant lines.
- The system struggles to reach the set temperature.
- What to do: If you suspect a refrigerant leak, contact a licensed HVAC technician. Refrigerant is hazardous to handle, and professionals are trained to locate and repair leaks safely. They can also recharge your system with the appropriate amount of refrigerant.
6. Check the Air Vents
Blocked or closed air vents can restrict the flow of cool air throughout your home, making it harder for the AC to maintain a consistent temperature.
- Ensure vents are open: Walk through your home and make sure all air vents are open and unobstructed. Furniture, rugs, or curtains may accidentally block vents, reducing airflow and cooling capacity.
- Check for blockages: Use a flashlight to look inside the vents for any debris or obstructions. If the vents are clogged with dust or dirt, clean them out to improve airflow.
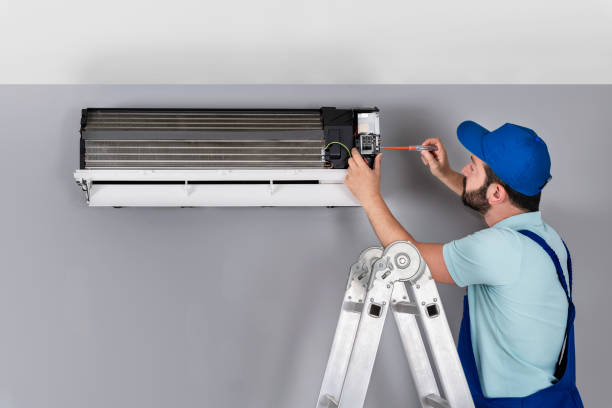
7. Inspect the Evaporator Coils
The evaporator coils are located inside the indoor air handler unit and are responsible for absorbing heat from the air. Over time, these coils can become dirty or even freeze, which can impact the system’s ability to cool the air effectively.
- Check for ice buildup: If you notice ice forming on the evaporator coils, it’s a sign of a problem. Ice buildup can occur due to low refrigerant levels, restricted airflow (e.g., from a dirty filter), or malfunctioning components.
- Clean the evaporator coils: Dirty coils can prevent proper heat transfer, leading to reduced cooling efficiency. If the coils appear dirty, turn off the power to the AC system and use a soft brush or cloth to remove dirt and debris. If the coils are frozen, let the system thaw completely before attempting to clean them.
8. Listen for Unusual Sounds
Your air conditioner should operate relatively quietly, so if you start hearing unusual sounds, it could be a sign of trouble.
- Rattling or banging: These noises could indicate that a part inside the AC unit is loose or damaged, such as the fan blades or motor.
- Hissing: A hissing noise could suggest a refrigerant leak, which requires immediate attention.
- Squealing or grinding: These sounds may point to issues with the blower motor or a lack of lubrication in the system’s moving parts.
Unusual sounds should never be ignored, as they often indicate underlying mechanical issues that could worsen if not addressed.
9. Check the Drain Line
The AC’s drain line removes moisture that accumulates during the cooling process. If the drain line becomes clogged or blocked, it can lead to water damage, mold growth, and system malfunctions.
- Locate the drain line: The drain line is typically a white PVC pipe near the indoor air handler unit.
- Inspect for clogs: If you notice water pooling around the AC unit or moisture in unexpected places, the drain line might be clogged. You can use a wet/dry vacuum to remove the clog or flush the line with a mixture of water and vinegar to clear out any buildup.
10. Monitor System Performance
Lastly, pay attention to how your AC is performing overall. If the system is running for longer periods than usual, struggling to cool your home, or causing your energy bills to spike, it may be an indication of a larger issue.
- Inconsistent cooling: If some rooms are cooler than others, it could be due to uneven airflow or blocked vents. Check for obstructions in the vents and make sure the thermostat is located in a central area for accurate temperature readings.
- Short cycling: If your AC turns on and off frequently (short cycling), it may be due to an oversized unit, thermostat issues, or airflow restrictions. Short cycling can put unnecessary strain on the system and increase energy consumption.
When to Call a Professional
While many air conditioning problems can be resolved with basic troubleshooting, some issues require the expertise of a licensed HVAC technician. If you’ve tried the above checks and your AC still isn’t performing properly, or if you suspect serious issues such as a refrigerant leak, electrical problems, or a malfunctioning compressor, it’s time to call in a professional.
An HVAC technician can perform a thorough inspection, diagnose the issue, and recommend the appropriate repairs to get your system running smoothly again.
Conclusion
Keeping your air conditioner in good working order is essential for maintaining a comfortable home environment during the hot summer months. By regularly checking your thermostat, air filters, circuit breaker, and outdoor unit, you can catch and resolve many common AC problems before they become major issues. With these simple troubleshooting steps, you can ensure your air conditioner operates efficiently, saves energy, and provides consistent cooling throughout your home.


